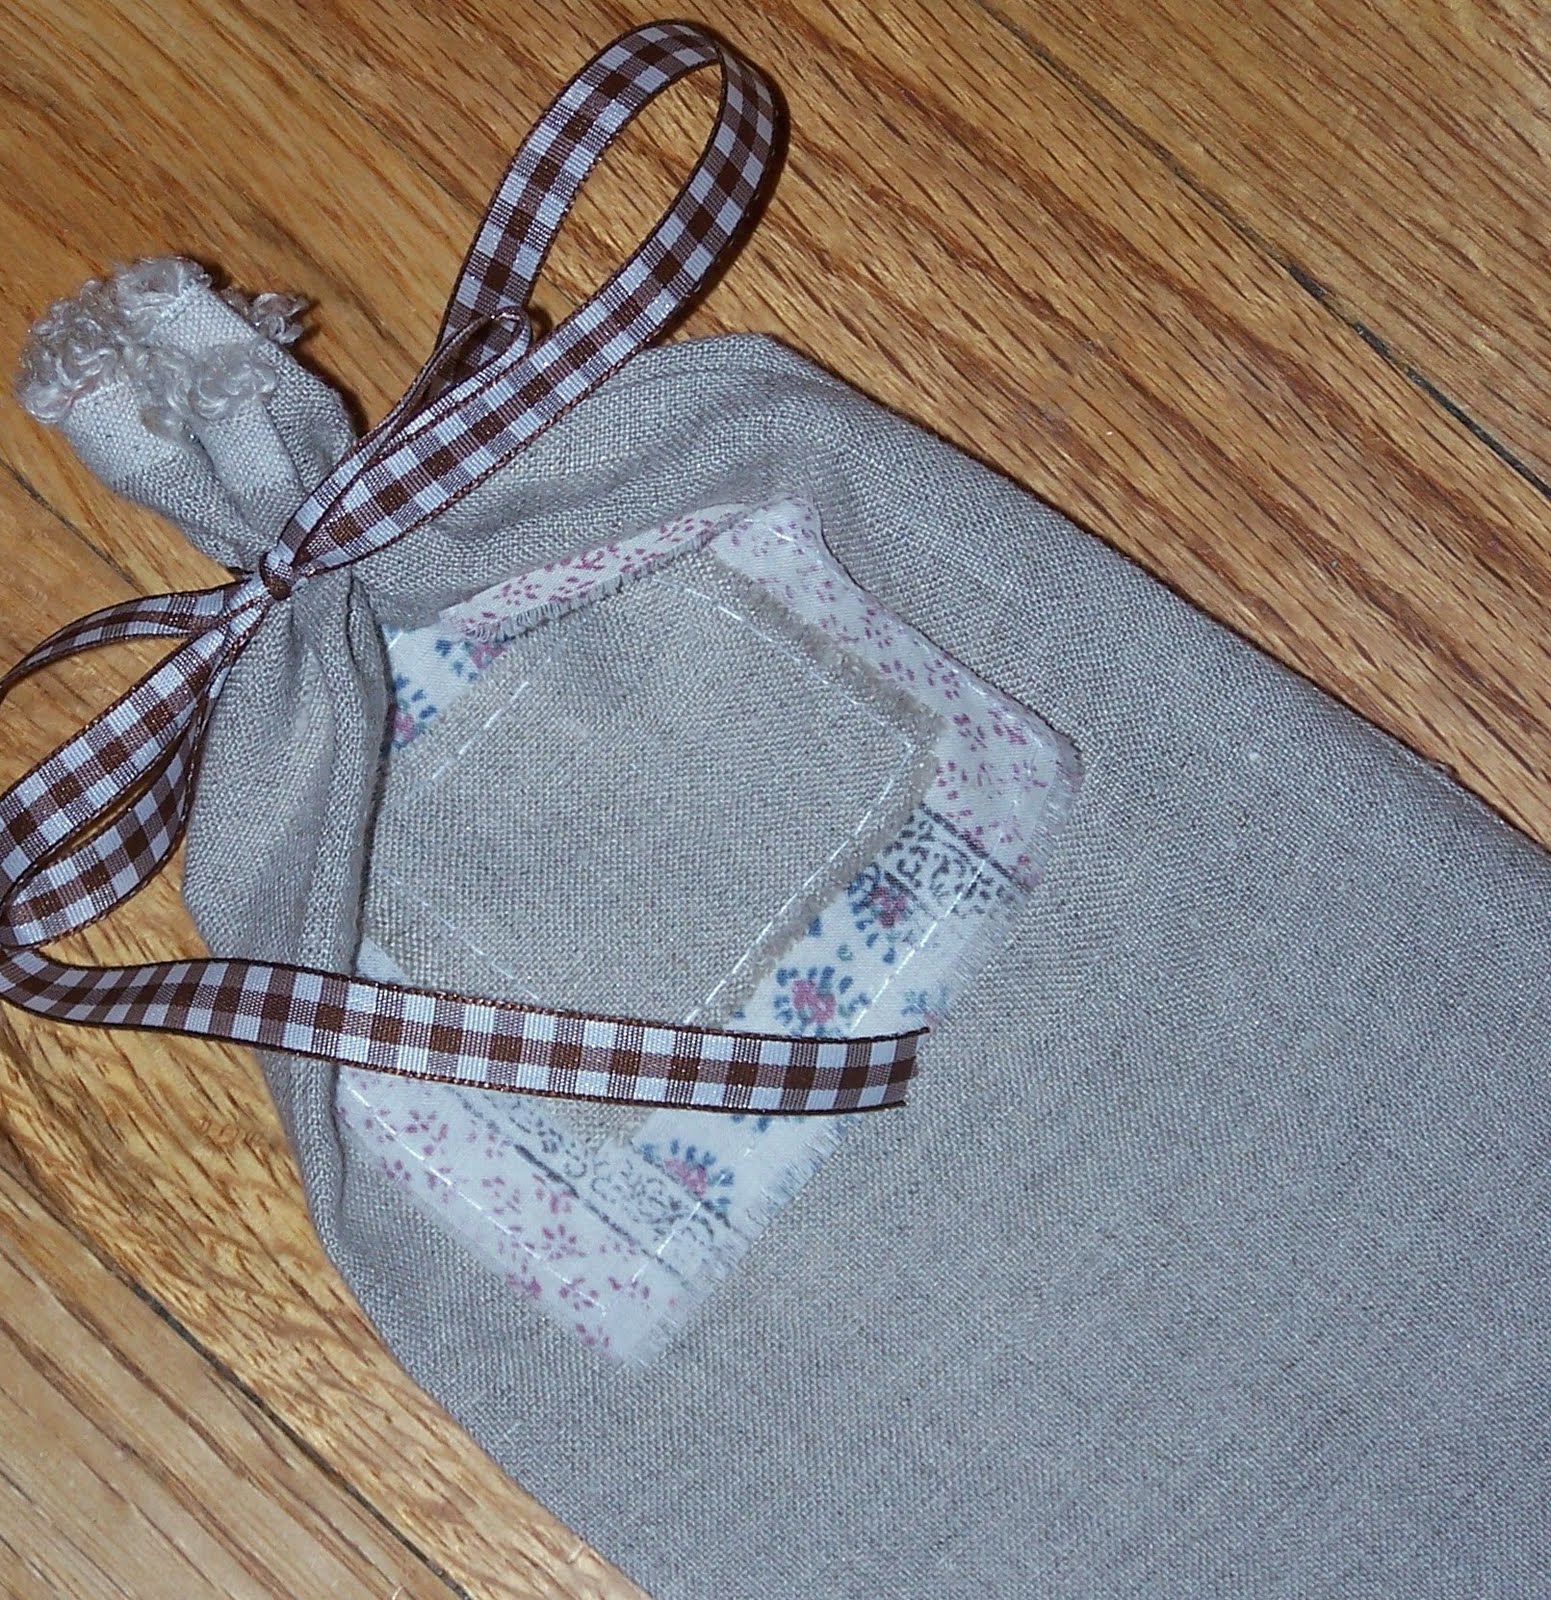
I've acquired quite a few knitting needles lately, and aside from keeping track of what sizes I've got, I want to mitigate heartbreak by trying to curb my habit of...well, loosing things.
I've seen knitting needle rolls all over the internet, and while I can already tell it's not going to solve my problems, it's at least a step in the right direction. All my needles are in the same place, and they're fairly well contained.
I think some elastic (or maybe putting a little more thought into measuring the pocket sizes?) would keep everything a little snugger and more secure, and maybe I'll try it out in Needle Roll v2.0.
This one here is a plain linen, and the inside print is a fat quarter of unknown origin. Maybe I need a better fabric tracking system, too?
Showing posts with label carriers and containers. Show all posts
Sunday, July 18, 2010
Sunday, May 16, 2010
Giveaway Day
Well, hello!
I'm stopping in to brush the dust off this blog to participate in the Sew, Mama, Sew! giveaway day. Since last posting I've moved, finished unpacking, hooked up the wireless and have even managed to sew a few things. And, I can't think of a better day than Giveaway Day to start this thing back up.
I've got a tote bag full of fabric scraps and some other sewing related accoutrements looking for a new home. The fabric is mostly quilting weight and has some sizeable scraps, from 2 inch strips to quarter yards, buttons, thread, an infamous tomato pincushion and some trims.
We'll play this by the rules of Giveaway Day. The giveaway will stay open until May 20, international readers are welcome to play along, and I'll use everyone's best friend, the random number generator, to pick the winner.
Since I'm still a bit rusty and might need some help getting back into the swing of blogging, leave a comment with your favorite types of crafty posts to read, tutorials you'd like to see, project suggestions, blah blah.
One comment per person, and pretty please make sure that I've got a way to contact you if you win!
I'm stopping in to brush the dust off this blog to participate in the Sew, Mama, Sew! giveaway day. Since last posting I've moved, finished unpacking, hooked up the wireless and have even managed to sew a few things. And, I can't think of a better day than Giveaway Day to start this thing back up.
I've got a tote bag full of fabric scraps and some other sewing related accoutrements looking for a new home. The fabric is mostly quilting weight and has some sizeable scraps, from 2 inch strips to quarter yards, buttons, thread, an infamous tomato pincushion and some trims.
We'll play this by the rules of Giveaway Day. The giveaway will stay open until May 20, international readers are welcome to play along, and I'll use everyone's best friend, the random number generator, to pick the winner.
Since I'm still a bit rusty and might need some help getting back into the swing of blogging, leave a comment with your favorite types of crafty posts to read, tutorials you'd like to see, project suggestions, blah blah.
One comment per person, and pretty please make sure that I've got a way to contact you if you win!
Thursday, March 25, 2010
Sometimes we should embrace the fray
I'm heading up north this weekend for a friends mini-reunion, and one of the girls will be running in a charity fun run. This is a charity that's pretty near and dear to her, and helped her with some problems in the past, so I wanted to get a Congratulations card. Congrats on finishing the foot race, and for getting across the finish line and tackling her problem head on.
I'm leaving early tomorrow morning, and remembered at...oh, about 9:00 tonight that I wanted to come bearing swag. I 'made' a 'card' by folding a piece of pretty cardstock and writing a note inside, and jumped at the chance to sit at the sewing machine to fashion up a little bagvelope. That's right. Bag + envelope.
There are no frills associated with the bagvelope. Not even one. No lining, just french seams on one side and the bottom. No pressing or folding of the patch on the front. I even pulled some strings to encourage a bit of fraying. Somewhere around here I've got a sharpie and I'll write her name on the front. Even the top is cut parallel to the selvedge so there was no casing, no pressing, no measuring, no anything at all. Solid linen, scrap silk and the thread that was already in my machine.
Best five minutes of my day.
I'm leaving early tomorrow morning, and remembered at...oh, about 9:00 tonight that I wanted to come bearing swag. I 'made' a 'card' by folding a piece of pretty cardstock and writing a note inside, and jumped at the chance to sit at the sewing machine to fashion up a little bagvelope. That's right. Bag + envelope.
There are no frills associated with the bagvelope. Not even one. No lining, just french seams on one side and the bottom. No pressing or folding of the patch on the front. I even pulled some strings to encourage a bit of fraying. Somewhere around here I've got a sharpie and I'll write her name on the front. Even the top is cut parallel to the selvedge so there was no casing, no pressing, no measuring, no anything at all. Solid linen, scrap silk and the thread that was already in my machine.
Best five minutes of my day.
Saturday, February 20, 2010
February 18-21: Patchwork drawstring bag
Since I'm going out of town this weekend I was going to cut major corners on this project and just show pictures of other bags I've got laying around, but the casing instructions on this bag were different than any I've made before, so I decided to give it a try.
The original is over at Pink Penguin. The casing pieces are folded in half and then attached to the bag after the outer bag pieces are already sewn together. It's a pretty easy way to do a casing on a patchwork bag, but I think I like for the drawstring to cinch an inch or do down on the bag instead of right at the top. I really like this one, though, so I might come around.
I cut 3 inch squares instead of 2.5 and only made three rows instead of four. I also cut all of the squares without a ruler (!!!) while I was watching television. Sure, my seams are wonky, and the patches don't line up perfect, but it made cutting go a lot faster, and from cut to complete this bag only took about a half hour.
This would be a perfect size bag for toting make-up and other girly things on my trip this weekend, but the liquid restrictions are back in full force, so it's quart a sized ZipLoc for me.
The original is over at Pink Penguin. The casing pieces are folded in half and then attached to the bag after the outer bag pieces are already sewn together. It's a pretty easy way to do a casing on a patchwork bag, but I think I like for the drawstring to cinch an inch or do down on the bag instead of right at the top. I really like this one, though, so I might come around.
I cut 3 inch squares instead of 2.5 and only made three rows instead of four. I also cut all of the squares without a ruler (!!!) while I was watching television. Sure, my seams are wonky, and the patches don't line up perfect, but it made cutting go a lot faster, and from cut to complete this bag only took about a half hour.
This would be a perfect size bag for toting make-up and other girly things on my trip this weekend, but the liquid restrictions are back in full force, so it's quart a sized ZipLoc for me.
Sunday, January 31, 2010
January 28-31: Tin can cover
To make this project, the tin can cover from elsie marley, I first had to track down a 28 oz tin can. Since I don't often have them laying around, and don't trust most foods that come in cans anyway, I had to dig pretty deep into the storage rack of various creamed soups and emergency vegetables to find a huge, dusty can of sauerkraut. I hesitated to dump it out and use it (even though I can't think of one time that I've dared make anything that called for sauerkraut out of can) because I didn't want to waste it. Then I noticed it expired in March of 2008. Not that you'd know, but I moved to my current house in January of 2009.
Does that mean this girl actually packed and moved a can of expired sauerkraut, you ask? Yes, I did.
Nasty spoiled food related anecdotes aside, I messed this project up pretty good, and it still came out pretty good. I'm going to blame it on my still feeling pretty sick, but you can free to take that as an excuse, because it sort of is.
I wanted to try thread sketching, but for the life of me I couldn't come up with anything to sketch. I want to use this can as a pen/pencil/spare change/wadded up gum wrapper holder on my desk, but I was afraid that a sketched pencil would just look like a wonky rectangle. So, I dug deep and come up with.....the letter A. In a pale, nearly impossible to see, pink. Wild, I know. There wasn't much to it, but it did help me realize that thread sketching might not be as scary as I'd thought, and I want to do it again. And soon.
The fabric doesn't wrap around the top of the can as called for, because I read and read and read and my medicine riddled brain just could not comprehend the directions. I debated trekking upstairs to pull up the original tutorial to see if the pictures would help, but realized that I didn't have any glue anyway, so that point was pretty moot. I sewed the edges shut and that's it.
I want to take it to work with me tomorrow, but my sniffer is still outta whack and I'm afraid it still smells like sauerkraut.
Does that mean this girl actually packed and moved a can of expired sauerkraut, you ask? Yes, I did.
Nasty spoiled food related anecdotes aside, I messed this project up pretty good, and it still came out pretty good. I'm going to blame it on my still feeling pretty sick, but you can free to take that as an excuse, because it sort of is.
The fabric doesn't wrap around the top of the can as called for, because I read and read and read and my medicine riddled brain just could not comprehend the directions. I debated trekking upstairs to pull up the original tutorial to see if the pictures would help, but realized that I didn't have any glue anyway, so that point was pretty moot. I sewed the edges shut and that's it.
I want to take it to work with me tomorrow, but my sniffer is still outta whack and I'm afraid it still smells like sauerkraut.
Labels:
2010,
carriers and containers,
embroidery,
for the home,
other places,
uh oh
Friday, January 29, 2010
January 25-27: Simple needle case
Oh, look. A Wednesday project. On a Friday. How very, well, me...of me.
I've totally got anexcuse good reason for being a bit late. See, I have a stuffy nose. And sore throat. And itchy ears. Also, I'm sick. In all honesty, though, if I'd have taken the time to read what this project was, I would totally have made it while I was lazing around on my sickbed. It didn't even take a full 15 minutes, cutting and pressing time included. Given that the only felt I had on hand was green, it sure was lucky that I had a perfect size scrap leftover from this bag.
I made two small adjustments to this tutorial from Wink Designs. The first was that I left out the trim that it supposed to encase the raw edge of the patterned fabric. I think sometimes we are all a bit to 'fraid of a little fray. I stitched about a 1/4" in away from the edge, pulled the few loose threads and the rest will fray up nicely until they get trapped by the stitched line. I think it will look charming. The second adjustment was to fold up the bottom half of the case (I didn't decide to do this until the last minute) to create a pocket. This way I can store a few needles and pins on the felt patch, but keep other accoutrements in the pocket. It wasn't in the original plan, but it suits me a bit better.
I've totally got an
I made two small adjustments to this tutorial from Wink Designs. The first was that I left out the trim that it supposed to encase the raw edge of the patterned fabric. I think sometimes we are all a bit to 'fraid of a little fray. I stitched about a 1/4" in away from the edge, pulled the few loose threads and the rest will fray up nicely until they get trapped by the stitched line. I think it will look charming. The second adjustment was to fold up the bottom half of the case (I didn't decide to do this until the last minute) to create a pocket. This way I can store a few needles and pins on the felt patch, but keep other accoutrements in the pocket. It wasn't in the original plan, but it suits me a bit better.
Monday, January 25, 2010
Tutorial: Drawstring bag
A drawstring bag is really simple to put together, there are a whole slew of ways to construct them, and there are a million uses for such a bag. This version is reversible, lined so that there are no raw edges visible, and the casing is reinforced to that there isn't fraying when the cords are cinched or pulled open.
Tutorial:
Assumptions (unless noted): Seams are 1/4", sewing is done with right sides together, backstitch each time you sew
Supplies: two pieces of fabric large enough to make your bag body, cording (I chose macrame, but ribbon, leather lace, twill tape, etc will work nicely), safety pin, thread, rotary cutter and/or scissors
To figure out the size of your fabric: Take a loose measurement of the item you want your bag to hold. I wanted a ball of yarn, needles and my half finished hat that measured about 8"x8" when I put in on my cutting mat. I added two inches to each side of the measurements to allow for cinching or bigger projects, so my bag sides will be 12"x12"
Cut:
1 piece bag outer (width equals your project width, length is project length time 2) I cut mine 12"x24"
1 piece bag inner the same size as the outer
2 pieces cording the width of your bag times 3 (mine was 12*3=36")
Step 1: Fold bag pieces in half lengthwise. Measure 1.25" from the top and mark. Measure 1" from that and mark again. Do this on both sides of the bag outer and bag inner. This will be your casing.
Step 2: Sew from the top of the bag down to your first mark. Pick up the needle and sew again from the second mark to the bottom of your bag. Again, do this on both sides of the bag outer and inner.
Step 3: Press seams open making note of holes that were left for casings.
Step 4: Stitch a box around the hole, catching both seams. This is the step that will reinforce the casing so that the ends don't poke out. (White thread used to be visible in photo, use coordinating thread)
Step 4 1/2: From the outside, it will look like this. And, yes, do this for both holes in the lining and bag outer.
Step 5: Turn bag inner right side in, and leave bag outer right side out. Place bag inner inside of bag outer so that the right sides are facing. Make sure that the holes for the casing line up.
Step 6: Stitch along the upper raw edges of the bag. Leave a two inch opening for turning.
Step 7: Turn bag right side out so that the bag outer and bag inner make a long rectangle.
Step 8 (Sorry! No photo): Shove bag inner into bag outer, then press the opening shut and stitch either with your machine (like I did) or blind stitch it closed with a handsewing needle and thread.
Tutorial:
Assumptions (unless noted): Seams are 1/4", sewing is done with right sides together, backstitch each time you sew
Supplies: two pieces of fabric large enough to make your bag body, cording (I chose macrame, but ribbon, leather lace, twill tape, etc will work nicely), safety pin, thread, rotary cutter and/or scissors
Cut:
1 piece bag outer (width equals your project width, length is project length time 2) I cut mine 12"x24"
1 piece bag inner the same size as the outer
2 pieces cording the width of your bag times 3 (mine was 12*3=36")
Step 5: Turn bag inner right side in, and leave bag outer right side out. Place bag inner inside of bag outer so that the right sides are facing. Make sure that the holes for the casing line up.
Step 8 (Sorry! No photo): Shove bag inner into bag outer, then press the opening shut and stitch either with your machine (like I did) or blind stitch it closed with a handsewing needle and thread.
Top of casing
Bottom of casing
Step 9: Again make sure that the holes for the casing are lined up, and stitch all the way around the bag right at the top of the casing holes. Stitch all the way around the bag again at the bottom of the casing holes. Your drawstring casing is now complete.
Step 10: Insert one edge of a drawstring cord into one of the casing holes. Thread it all the way around until it pokes back out of the casing hole right next to the one you started with. Tie both ends in a knot. Repeat this step but insert the cord into the OPPOSITE side of the bag that you put the first cord in. Tie another knot in this cord.
Step 11: Pull each side of the cord, and your bag should cinch together. Fill bag, pull closed and tote around. If you get tired of your bag, you can pull it right side out and by just flipping the cord around, you'll look like you've got a whole new sack!
THE END!
Sunday, January 24, 2010
January 21-24: Pet bed (turned car caddy)
The project for January 21-24 is a pet bed from Lori Marie I debated not even doing this project, because it was a fabric hogger and I have no pets. I spent two days trying to figure out what I could make that would drastically shrink this down and still be at least a little bit useful. Also I wanted to lay on the couch and eat guacamole.
I didn't want to fail and quit making the projects only a month into the year, so I was going to wuss out and just make a pincushion, but once I saw the picture on the back of the calendar page, with a big hole in the middle of the pet bed, pincushion was out of the question. For Christmas my mom got my aunt a neat contraption that sits on a car dashboard and hold a GPS unit while you drive, and it looked a little (tiny) bit like this, so in a moment of brilliance (snort!) I came up with an idea, cut into the fabric and gave it a whirl.
Obviously a lot of modifications were made. Truthfully, this project barely resembled the tutorial once I started sewing. It's a lot smaller, and it's actually a little bigger than it really needs to be. I cut to accommodate a seam allowance that I didn't end up sewing, so I ended up with an extra inch on the bottom panel. I sewed the tube wrong sides together first and then turned it right side out and stuffed it with rice instead of fiberfill, which gives it a little more weight and I hope will help it stay in place. Since I didn't have any nonskid fabric, I cut a drawer liner that's pretty...grippy? and stitched the bottom with french seams because I don't really like CANNOT TAKE raw edges, and it became pretty clear that no matter how I put this together, I was going to have them.
Since this was an experiment in sizing, stuffing and construction the end result isn't ideal, but I really, really like this idea. The GPS holders that you see in stores are so...boring, and I am so excited to see one with a bit more moxie. Once I take take this one out for a ride (pun intended) and see how the size and design can be improved I will most definitely be making more of these. If you have any ideas, I love to hear them.
I didn't want to fail and quit making the projects only a month into the year, so I was going to wuss out and just make a pincushion, but once I saw the picture on the back of the calendar page, with a big hole in the middle of the pet bed, pincushion was out of the question. For Christmas my mom got my aunt a neat contraption that sits on a car dashboard and hold a GPS unit while you drive, and it looked a little (tiny) bit like this, so in a moment of brilliance (snort!) I came up with an idea, cut into the fabric and gave it a whirl.
Thursday, January 21, 2010
January 18-20: Lunch bag with wristlet
The project for January 18-20 is a lunch sack with a wristlet strap from IS*LY.
I made a lot of changes to this tutorial, and I will tell you why. Because I am NUTS, and, again, I will tell you why.
When I first saw this lunch bag, I was really excited to make it. I have a job, I eat food, Ialways get a occasionally get a lunch break -- perfect bag to tote back and forth to the office. I had a bright idea to maybe use some vinyl-ish fabric that I have in my stash to make this not only a little sturdier, but to also make it a bit more spill-leak-water-sauce proof. Then, OH THEN!, I spotted some oilcloth that I had left over from some travel bags that I had made and had never found a perfect use for again. So, I decided so make this bag with the oilcloth. Good idea, right?
Ha. HahahaSOB. (Earmuff small children and the elderly now!) THIS? was a b-i-t-c-h to sew. Stitches were skipping, the fabric was shifting, birdsnests were forming and turning (oh! the turning!) was like a workout for my arms. I looked over the IS*LY blog while I was getting the full links, and everything over there is just great, so I know that the fault totally lies with me and my stupid fabric choice.
Without all of the gory, swear word riddled details, the modifications I made were:
1. No lining. Oilcloth doesn't fray, the wrong side is still water and spill proof, so there wasn't a need (thank goodness).
2. No inner pockets, because there was no lining.
3. Only one outer pocket because I started getting swear-y after sewing on the first one, and decided I could live without the second.
4. The enclosure flap was just one piece, so none of that sew together, turn right side out, topstitch business (thank goodness again).
5. No corner pleats because I had cried uncle at that point. If I had to feed that oilcloth under my presserfoot one more time I was likely to burst into tears and besides I like that the top opens really wide and makes the inside extra roomy, OK?!?!
That said, the sack doesn't look so bad. And for all the sweating and cringing that the oilcloth caused, I did enjoy not popping over to the ironing board to press seams every five seconds. It's possible that when the pain of putting this together dulls a bit I'll go back and try the fabric/lined version.
PS -- I was checking out my stats the other day and noticed that a ton of visitors were referred by googling for drawstring bag tutorials. Since I hate to think of how all those people were disappointed to find that I don't have that tutorial, I'm going to try to put on together in the next week or so.
I made a lot of changes to this tutorial, and I will tell you why. Because I am NUTS, and, again, I will tell you why.
When I first saw this lunch bag, I was really excited to make it. I have a job, I eat food, I
Ha. HahahaSOB. (Earmuff small children and the elderly now!) THIS? was a b-i-t-c-h to sew. Stitches were skipping, the fabric was shifting, birdsnests were forming and turning (oh! the turning!) was like a workout for my arms. I looked over the IS*LY blog while I was getting the full links, and everything over there is just great, so I know that the fault totally lies with me and my stupid fabric choice.
Without all of the gory, swear word riddled details, the modifications I made were:
1. No lining. Oilcloth doesn't fray, the wrong side is still water and spill proof, so there wasn't a need (thank goodness).
2. No inner pockets, because there was no lining.
3. Only one outer pocket because I started getting swear-y after sewing on the first one, and decided I could live without the second.
4. The enclosure flap was just one piece, so none of that sew together, turn right side out, topstitch business (thank goodness again).
5. No corner pleats because I had cried uncle at that point. If I had to feed that oilcloth under my presserfoot one more time I was likely to burst into tears and besides I like that the top opens really wide and makes the inside extra roomy, OK?!?!
That said, the sack doesn't look so bad. And for all the sweating and cringing that the oilcloth caused, I did enjoy not popping over to the ironing board to press seams every five seconds. It's possible that when the pain of putting this together dulls a bit I'll go back and try the fabric/lined version.
PS -- I was checking out my stats the other day and noticed that a ton of visitors were referred by googling for drawstring bag tutorials. Since I hate to think of how all those people were disappointed to find that I don't have that tutorial, I'm going to try to put on together in the next week or so.
Wednesday, January 13, 2010
Paisleys, pinks and greens galore
I furiously sewed my last few projects to get up to speed with the projects in the calendar, but I was able to take some time in the past couple of days to sew some bags that I just adore.
I love each of these bags, but I've decided to update the shop a bit and put them all out there. Sure, it's not that I couldn't come up with reasons to fill each of these bags, but I do get the urge to share from time to time.
Monday, January 11, 2010
January 7-10: Backseat car cover (turned office organizer)
The project for January 7-10 was, again, something that I just wouldn't get much use out of. It's not that I don't have a messy car, because BOY DO I!, but I just couldn't picture myself actually placing my junk in pockets hanging on the back of my seat. I do see the usefulness, though, and if I ever get the urge I can think of a few people that might really like one of these.
Anyway. Today's project was from The Mayfly and was her backseat car organizer. Even though I didn't want to make an organizer to fit a whole seatback, I still wanted my version to at least resemble the original, so I just shrunk it. I followed the pattern pretty much exactly, just in a much smaller format. Again, this only took about a fat quarter so it was a total steal fabric-wise.
Since I opted to have my mini-organizer hang on my cubicle wall, I didn't have to sew buttonholes on top, but I did attach little suede loops to hang on pushpins. My lower pockets are about 4 inches tall, and the upper pen pocket is about two inches tall. I opted for home dec weight fabric to give my organizer a little stability.
Let's all see how long it lasts before this guy is filled with nothing but pen caps, expired receipts and old to-do lists. I'm guessing about a week.
Anyway. Today's project was from The Mayfly and was her backseat car organizer. Even though I didn't want to make an organizer to fit a whole seatback, I still wanted my version to at least resemble the original, so I just shrunk it. I followed the pattern pretty much exactly, just in a much smaller format. Again, this only took about a fat quarter so it was a total steal fabric-wise.
Pretend the calendar page is also in the photo, K?
Since I opted to have my mini-organizer hang on my cubicle wall, I didn't have to sew buttonholes on top, but I did attach little suede loops to hang on pushpins. My lower pockets are about 4 inches tall, and the upper pen pocket is about two inches tall. I opted for home dec weight fabric to give my organizer a little stability.
Let's all see how long it lasts before this guy is filled with nothing but pen caps, expired receipts and old to-do lists. I'm guessing about a week.
Sunday, January 10, 2010
January 4-6: Yoga mat bag turned shoe carrier
I can think of hundreds of reasons to make a bag. I can think of hundreds of things that I could put into a bag. A yoga mat, for me at least, is not one of those things. But of course, the project for January 4-6 was from Bored and Crafty and was originally designed to carry a yoga mat.
I followed the original directions to measure the length and circumference of my carry-able object then cut and sewed my pieces just as described. My bag was obviously shorter than the original, taking up only a fat quarter for the outer bag and another for the inner bag. I also omitted the strap used to carry it over my shoulder which saved some additional fabric. I fused some lightweight interfacing to the lining fabric and double interfaced the bottom for stability, but ended up with a bag that almost stands up by itself, so looking back I didn't really need to add that step. I also folded, stitched and pressed the opening of my drawstring casing as an added precaution against frays.
With more snow in the forecast tonight, this baby will be making it's maiden voyage to the office tomorrow.
I wanted to follow the directions pretty closely and have my end result be similar to the original project. I looked around the house for something roundish and longish and didn't find much. What I did find was a sweet pair of heels that I scored on an 80% off (I know, right?) sale this weekend, and opted for a shoe bag. Given that I live in Michigan and the ground is covered in ice and snow (and not even the pretty white kind, the kind that's sloppy and brownish from tire tracks and car exhaust) so actually wearing said heels outside is out of the question, especially if I want to keep my legs out of plaster casts, so a bag to carry them to and from the office seems in good order.
I followed the original directions to measure the length and circumference of my carry-able object then cut and sewed my pieces just as described. My bag was obviously shorter than the original, taking up only a fat quarter for the outer bag and another for the inner bag. I also omitted the strap used to carry it over my shoulder which saved some additional fabric. I fused some lightweight interfacing to the lining fabric and double interfaced the bottom for stability, but ended up with a bag that almost stands up by itself, so looking back I didn't really need to add that step. I also folded, stitched and pressed the opening of my drawstring casing as an added precaution against frays.
With more snow in the forecast tonight, this baby will be making it's maiden voyage to the office tomorrow.
Friday, January 8, 2010
Ninety nine cents well spent
I was working browsing the archives of sewing blogs last week and found out that one of my favorite creative bloggers Creative Little Daisy had written a pattern for Simplicity! Even better, it was a pattern I had picked up during a JoAnn 99-cent sale a few weeks before. Huzzah!
Now, I'm not excellent at following bag patterns, and most of the time I feel like commerical patterns are written in a language that I don't totally understand, but I wanted to rush right home and give this one a try! So, a week later, I did just that.
I bought a scrap pack from Anna Maria Horner that I think would look amazing paired with a natural linen as View C of this pattern (Simplicity 2617), but I didn't want to waste them if I couldn't follow the directions, so I opted for some stashed scraps and a few strips of white linen that I had on hand so that I could test it out. The lining is plain ol' unbleached muslin.
I ended up making View B, not C (like I wanted), because the linen strips I had were too small to accommodate View C and I even had to shorten the sides and gusset of the bag I made by about an inch. Like we've already discussed, I'm stingy, and I didn't want to cut into something brand new. Then, since I was just testing the pattern out, and also because I am l-a-z-y, I didn't want to take up a bunch of time making a zippered inner pocket, so I opted for a patch pocket instead. Finally, I stitched a double line near the edges of the handle and didn't stitch the rest of the lines that the pattern called for.
I'm not head over heels with all of the fabrics, but I do like the shape of the bag and I like that it's roomier inside than it looks. I carry a lot of stuff, you see, and I need a place to put it all. View C is still more my style than this version of the bag, so I'm going to end up making anyway. I'm nothing if not a sucker for making things more complicated, so by testing this out and having it work fairly well, I've just created even more work for myself. Neat.
Now, I'm not excellent at following bag patterns, and most of the time I feel like commerical patterns are written in a language that I don't totally understand, but I wanted to rush right home and give this one a try! So, a week later, I did just that.
I bought a scrap pack from Anna Maria Horner that I think would look amazing paired with a natural linen as View C of this pattern (Simplicity 2617), but I didn't want to waste them if I couldn't follow the directions, so I opted for some stashed scraps and a few strips of white linen that I had on hand so that I could test it out. The lining is plain ol' unbleached muslin.
I ended up making View B, not C (like I wanted), because the linen strips I had were too small to accommodate View C and I even had to shorten the sides and gusset of the bag I made by about an inch. Like we've already discussed, I'm stingy, and I didn't want to cut into something brand new. Then, since I was just testing the pattern out, and also because I am l-a-z-y, I didn't want to take up a bunch of time making a zippered inner pocket, so I opted for a patch pocket instead. Finally, I stitched a double line near the edges of the handle and didn't stitch the rest of the lines that the pattern called for.
I'm not head over heels with all of the fabrics, but I do like the shape of the bag and I like that it's roomier inside than it looks. I carry a lot of stuff, you see, and I need a place to put it all. View C is still more my style than this version of the bag, so I'm going to end up making anyway. I'm nothing if not a sucker for making things more complicated, so by testing this out and having it work fairly well, I've just created even more work for myself. Neat.
Thursday, December 31, 2009
Brown Paper Packages: Swaptastic
I love that the crafty blogosphere gives us all the opportunity to share our projects and our thoughts and inspiration and missteps and our favorite things. I also love the awesome bloggers that host swaps that allow us to exchange actual THINGS. Things that you can feel and use and get for free can share with other lovely ladies who craft.
I've done three swaps this year, two for supplies and one for handmade gifts. In my supply exchanges I've received tons of awesome buttons, so really pretty trims and ribbons, fat quarters that I never would have bought for myself but loved as soon as I had them in my hands, vintage bias tapes and scraps that I've done my best to make into lovely finished items.
My handmade gift exchange I sent off (in a huge rush) about a week before Christmas as soon as I realized that mail delivery was going to start slowing down and I needed to get my butt in gear. The rules of the exchange were one gift to spoil the person, one gift for the home and one gift to eat. (Don't worry, for the gift to eat my roommate offered to give me some outrageously tasty Holiday pastry balls (heh) to send so that my giftee was spared my baking.) I wish I had bothered to take better pictures, but I was flying to get them into the box.
The "for the person" gift was this granny bag. The handles are a brown suede lace and the fabric is a Kaffe Fassett print from my local quilt shop. I love a granny bag because they're so easy to throw a bunch of things in and tote around, but they're cute enough so you don't feel like your schlubbing a junk bag.
I ended up making two "for the home" gifts. I first made this fabric basket out of a creamy linen and (vintage, maybe?) floral print that I just LOVE, but I had such a small amount of scrap left over from the granny bag that I wanted to give the pillow a try. The envelope flaps on the back are the same print as the bag and the criss-cross on the front. It ended up matching so nicely and looked so pretty with the linen that I included it in the package.
I hope my recipient has as much fun opening these treats as I had making them.
I've done three swaps this year, two for supplies and one for handmade gifts. In my supply exchanges I've received tons of awesome buttons, so really pretty trims and ribbons, fat quarters that I never would have bought for myself but loved as soon as I had them in my hands, vintage bias tapes and scraps that I've done my best to make into lovely finished items.
My handmade gift exchange I sent off (in a huge rush) about a week before Christmas as soon as I realized that mail delivery was going to start slowing down and I needed to get my butt in gear. The rules of the exchange were one gift to spoil the person, one gift for the home and one gift to eat. (Don't worry, for the gift to eat my roommate offered to give me some outrageously tasty Holiday pastry balls (heh) to send so that my giftee was spared my baking.) I wish I had bothered to take better pictures, but I was flying to get them into the box.
The "for the person" gift was this granny bag. The handles are a brown suede lace and the fabric is a Kaffe Fassett print from my local quilt shop. I love a granny bag because they're so easy to throw a bunch of things in and tote around, but they're cute enough so you don't feel like your schlubbing a junk bag.
I ended up making two "for the home" gifts. I first made this fabric basket out of a creamy linen and (vintage, maybe?) floral print that I just LOVE, but I had such a small amount of scrap left over from the granny bag that I wanted to give the pillow a try. The envelope flaps on the back are the same print as the bag and the criss-cross on the front. It ended up matching so nicely and looked so pretty with the linen that I included it in the package.
I hope my recipient has as much fun opening these treats as I had making them.
Labels:
carriers and containers,
for the home,
gifts,
other places
Sunday, December 20, 2009
Many fine things can be done in a day
This is not one of them.
I've made tote bags similar to this before, including the one that I carry almost everyday, but this one was causing me so much stress that I kept putting it to the side to finish other projects instead. Even so, I'm really psyched about the way this turned out. I'm having such a problem letting it go that I see a olive green linen and brown gingham sibling in my future. I love the way it looks, I love that it's really roomy but doesn't look like a massive suitcase and I love the way the pleats make it look a little bit more interesting than just a plain tote. I've got to say, though, making a bag this big and this pleated with slippery, wrinkle prone linen made me say bad words more than I'd like to admit.
I picked an oyster linen out for this one because it's a Christmas gift for my pickiest cousin and even though I've got a stash full of some really proper fabrics, I just know I'd never pick the right print. I really like the simplicity of the linen though, and it makes it look a lot more sophisticated (snort) BUT! I did sneak these orange polka dots in as the lining, because there had to be just a little bit of livelihood.
Before this one gets wrapped up it's definitely due for a short wash and steam to get rid of the wrinkles. I was just so excited that it was finally done that I had to get it up right away!
I've made tote bags similar to this before, including the one that I carry almost everyday, but this one was causing me so much stress that I kept putting it to the side to finish other projects instead. Even so, I'm really psyched about the way this turned out. I'm having such a problem letting it go that I see a olive green linen and brown gingham sibling in my future. I love the way it looks, I love that it's really roomy but doesn't look like a massive suitcase and I love the way the pleats make it look a little bit more interesting than just a plain tote. I've got to say, though, making a bag this big and this pleated with slippery, wrinkle prone linen made me say bad words more than I'd like to admit.
I picked an oyster linen out for this one because it's a Christmas gift for my pickiest cousin and even though I've got a stash full of some really proper fabrics, I just know I'd never pick the right print. I really like the simplicity of the linen though, and it makes it look a lot more sophisticated (snort) BUT! I did sneak these orange polka dots in as the lining, because there had to be just a little bit of livelihood.
Before this one gets wrapped up it's definitely due for a short wash and steam to get rid of the wrinkles. I was just so excited that it was finally done that I had to get it up right away!
Thursday, December 3, 2009
Book It
First things first. I am totally floored by the comments on the last post! You all are far, far too kind. If it's the Sew, Mama, Sew! Giveaway Day post you're looking for, head here. You're more than welcome to stick around and read on, though.
*****
The latest bag of the Holiday Season Of Non-stop Sewing is for my mom's book club gift swap. Just a simple flat-bottomed tote, but with pockets in the front instead of on the inside.
Since this is meant for a book club member, I put the handles a bit further apart than standard to make sure a paperback could fit in the pockets. The side pockets are smaller that way, but will still easily fit pens/pencils and a cell phone if it's thin enough (read: not mine).
The pocket fabric is the oh-so-swoonable Authentic by Sweetwater. The lining and bag body were supposed to be the Word Play print of the same line, but,it just didn't look right I cut it upside down. Oops.
Luckily! I'm very stingy and will not throw away extra fabulous fabric just because I effed up. So, I made this.
I have no idea where this scrap of green came from, but it matches my black and lime green bathroom pretty great. I was going to make the outside of the basket green to show a little more color in an otherwise boring room, but like I said...STINGY!...so I wanted to show off the pretty. I've got just enough of each left to make another basket, so maybe I'll do that one inverted? Maybe.
*****
The latest bag of the Holiday Season Of Non-stop Sewing is for my mom's book club gift swap. Just a simple flat-bottomed tote, but with pockets in the front instead of on the inside.
Since this is meant for a book club member, I put the handles a bit further apart than standard to make sure a paperback could fit in the pockets. The side pockets are smaller that way, but will still easily fit pens/pencils and a cell phone if it's thin enough (read: not mine).
The pocket fabric is the oh-so-swoonable Authentic by Sweetwater. The lining and bag body were supposed to be the Word Play print of the same line, but,
Luckily! I'm very stingy and will not throw away extra fabulous fabric just because I effed up. So, I made this.
I have no idea where this scrap of green came from, but it matches my black and lime green bathroom pretty great. I was going to make the outside of the basket green to show a little more color in an otherwise boring room, but like I said...STINGY!...so I wanted to show off the pretty. I've got just enough of each left to make another basket, so maybe I'll do that one inverted? Maybe.
Tuesday, December 1, 2009
Giveaway Day!
It's the day we've all been waiting for! Sew, Mama, Sew! is hosting Giveaway Day!
I've got two chances to win today, one for a finished Buttercup Bag (adapted from the design by Rae Hoekstra) in a creamy white linen/rayon blend with a simple sage green cotton print lining and band.
Then! Another reader will get a kit to follow my tutorial and make a complete cubed drawstring pouch. 5 charm squares (Michael Miller and... I forgot. Cute, though), a linen/rayon blend for the lining, 16" of trim for the casings, 44" of ribbon for ties, and a scrap of decor bond to sturdy up the bottom. You're totally covered, just add sewing machine and thread.
The Good Stuff:
1. Comment on this post to enter. Gain another entry by tweeting or blogging about this post, then come back and leave another comment with the link.
2. The giveaway will close December 6, 2009, winners to be posted December 7, 2009.
3. If your email address isn't public on your blog and/or blogger profile, please leave it in your comment.
4. This giveaway is open to anyone is the whole wide world.
Don't forget to check out the rest of the blogs/shops participating in Giveaway Day. I know I'll have some stiff competition for all of the neat swag out there!
Tuesday, November 24, 2009
Cubed Drawstring Pouch: Tutorial
Better late than never, right? Right.
To get started with this pouch, you'll need:
6 squares of fabric measuring 5". I used charm squares, so they were precut
1 16" by 5" rectangle
1 strip trim (I used cotton lace) 16"
1. Arrange 4 squares to make the sides of the pouch. With right sides together sew squares together to form 1 long strip.
2. Fold strip in half lenghtwise and sew the raw 5" sides together.
Flipped right side out (but you don't need to flip it yet) it will look like this.
3. If you're using fusible interfacing, fuse it to the wrong side of your bottom square now. If you're using sew-in, baste it now.
4. Right sides together, pin the bottom square, matching corners, to the sides of the pouch. Use a lot of pins if you need to keep it in line.
5. With the sides facing up (if they don't flop down, fold them toward the middle), sew around all four edges of the pouch bottom. Pivot at each corner with the needle still in to sew all of the edges. You may have to "flip" your pouch side under your needle to keep sewing aftter turning. That's OK. You also might want to backstitch at the corners for strength.
7. Take long rectangle (lining) and fold in half, right sides together, with the two short raw edges lined up. Sew raw edges.
8. Pin inside bottom, right sides together, to the lining sides just as you did the outer sides and sew (just as you did the outside). Leave about a two inch opening on one edge for turning.
9. Cut 8 2" strips of your trim (to be used as the drawstring casing) and fold in half to make 1" loops.
10. Put the pouch outer inside of the pouch lining (make sure right sides are facing) matching up the side seams. As you match them up, pin the casing strips in between the two layers. The loop with be facing down and the raw edges will line up with the raw edges of your pouch. Put the casing strips at each side seam, and halfway (2.25") between each seam.
11. Sew around the entire top of pouch, backstitching over the casing strips for stability.
12. Pull the pouch through the hole you left for turning, poking out the corners.
13. Using a slip stitch or with a scant 1/8" seam on your machine sew the hole closed.
14. Push the lining into the pouch, and press the top even.
15. Topstitch 1/8" from the edge of the pouch.
16. Cut the 2 22" drawstring cords
17. Weave the cords through the casing and tie the ends together. Begin weaving your second cord into the casing strips you tied your first cord off at. You want the tied edges to be on opposite sides of the pouch. (Note: These might shift as you use them, just adjust them as you like)
18. Cinch up the drawstring to close the pouch.
19. Admire. Use. Repeat.
If you have trouble or if you make a pouch and want to share it email me!
Like the pouch but want to save the time of making it? I've got a few in my shop.
To get started with this pouch, you'll need:
6 squares of fabric measuring 5". I used charm squares, so they were precut
1 16" by 5" rectangle
1 strip trim (I used cotton lace) 16"
1 5" square interfacing
2 22" strips drawstring cord (I used suede lace) (not pictured)Plus, the usual suspects: scissors/rotary cutter, thread, pins, sewing machine
Assumptions: 1/4" seam, unless noted. Clip all seams after stitching. That I was getting antsy and forgot to photo some steps.
1. Arrange 4 squares to make the sides of the pouch. With right sides together sew squares together to form 1 long strip.
2. Fold strip in half lenghtwise and sew the raw 5" sides together.
Flipped right side out (but you don't need to flip it yet) it will look like this.
3. If you're using fusible interfacing, fuse it to the wrong side of your bottom square now. If you're using sew-in, baste it now.
4. Right sides together, pin the bottom square, matching corners, to the sides of the pouch. Use a lot of pins if you need to keep it in line.
5. With the sides facing up (if they don't flop down, fold them toward the middle), sew around all four edges of the pouch bottom. Pivot at each corner with the needle still in to sew all of the edges. You may have to "flip" your pouch side under your needle to keep sewing aftter turning. That's OK. You also might want to backstitch at the corners for strength.
6. Flip right side out.
7. Take long rectangle (lining) and fold in half, right sides together, with the two short raw edges lined up. Sew raw edges.
8. Pin inside bottom, right sides together, to the lining sides just as you did the outer sides and sew (just as you did the outside). Leave about a two inch opening on one edge for turning.
9. Cut 8 2" strips of your trim (to be used as the drawstring casing) and fold in half to make 1" loops.
10. Put the pouch outer inside of the pouch lining (make sure right sides are facing) matching up the side seams. As you match them up, pin the casing strips in between the two layers. The loop with be facing down and the raw edges will line up with the raw edges of your pouch. Put the casing strips at each side seam, and halfway (2.25") between each seam.
11. Sew around the entire top of pouch, backstitching over the casing strips for stability.
12. Pull the pouch through the hole you left for turning, poking out the corners.
13. Using a slip stitch or with a scant 1/8" seam on your machine sew the hole closed.
14. Push the lining into the pouch, and press the top even.
15. Topstitch 1/8" from the edge of the pouch.
16. Cut the 2 22" drawstring cords
17. Weave the cords through the casing and tie the ends together. Begin weaving your second cord into the casing strips you tied your first cord off at. You want the tied edges to be on opposite sides of the pouch. (Note: These might shift as you use them, just adjust them as you like)
18. Cinch up the drawstring to close the pouch.
19. Admire. Use. Repeat.
If you have trouble or if you make a pouch and want to share it email me!
Like the pouch but want to save the time of making it? I've got a few in my shop.
Subscribe to:
Posts (Atom)